One of the more common non-technical questions we get from clients relates to methods and best practices for sending bulk emails. Most solutions require you to send emails using your organization’s email domain which adds credibility but also comes with spam considerations.
There are countless bulk email platforms you can utilize that make this task simple such as Mailchimp, Constant Contact, Brevo, etc. An email platform is preferable when advanced analytics, automated workflows, compliance adherence, and robust scalability are crucial. These platforms offer comprehensive analytics tools, intricate automation capabilities, compliance features, and optimized deliverability, making them ideal for large-scale, data-sensitive, and complex campaigns.
On the other hand, Microsoft 365’s Mail Merge is a straightforward, cost-effective solution suitable for users familiar with the Microsoft ecosystem. It’s integrated into applications like Word and Outlook, making it convenient for those already using these tools. Mail Merge is well-suited for smaller campaigns where advanced features aren’t necessary, providing an economical and efficient solution for basic bulk email needs.
In This Article
Bulk Emailing Steps With Microsoft
2024 Email Best Practice Updates
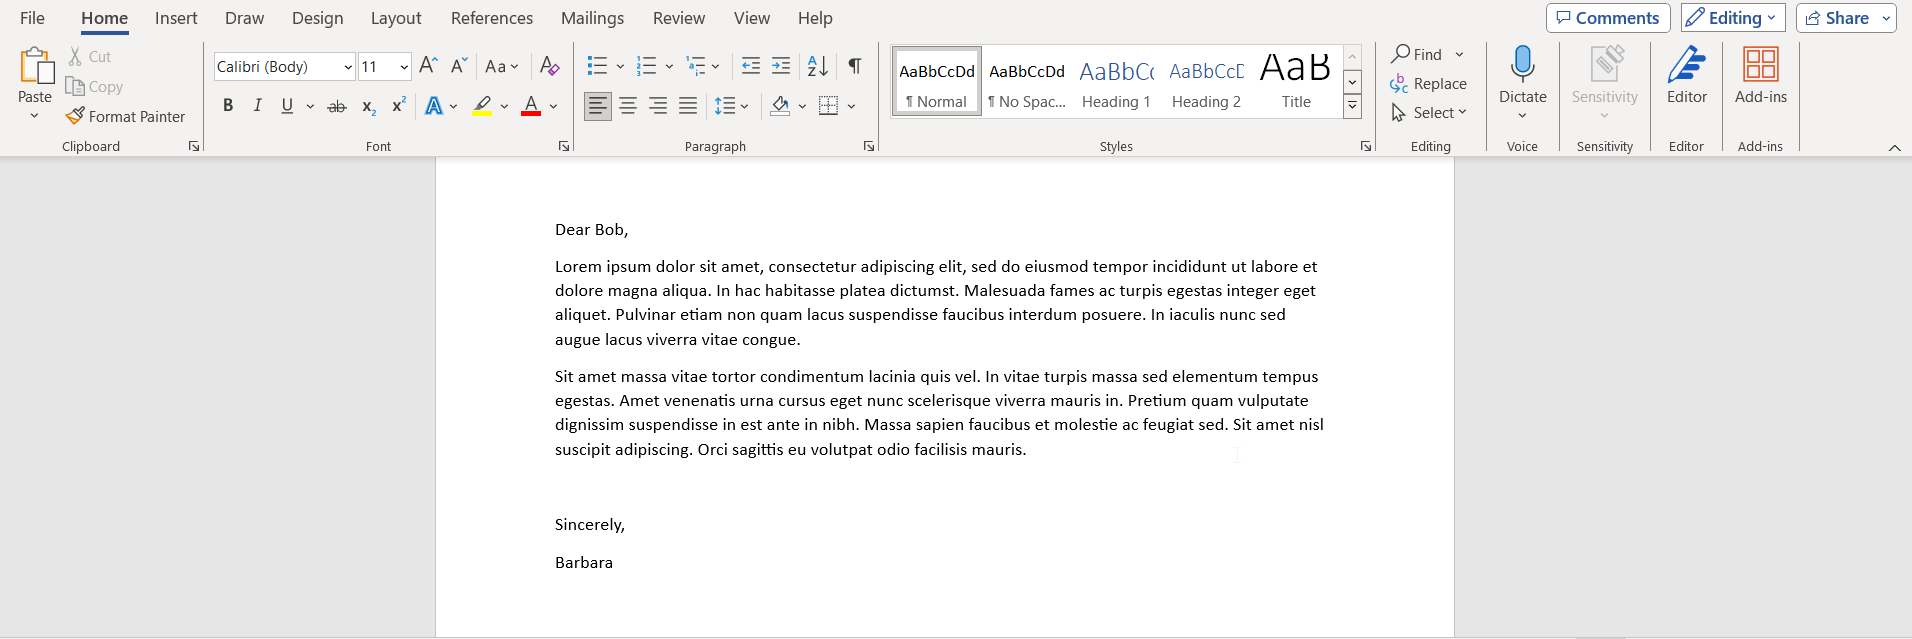
Step 1: Draft your email in Microsoft Word
Open Word and write out the body of the email message. You can include images, links, and other formatting elements as needed.
Step 2: Start Mail Merge
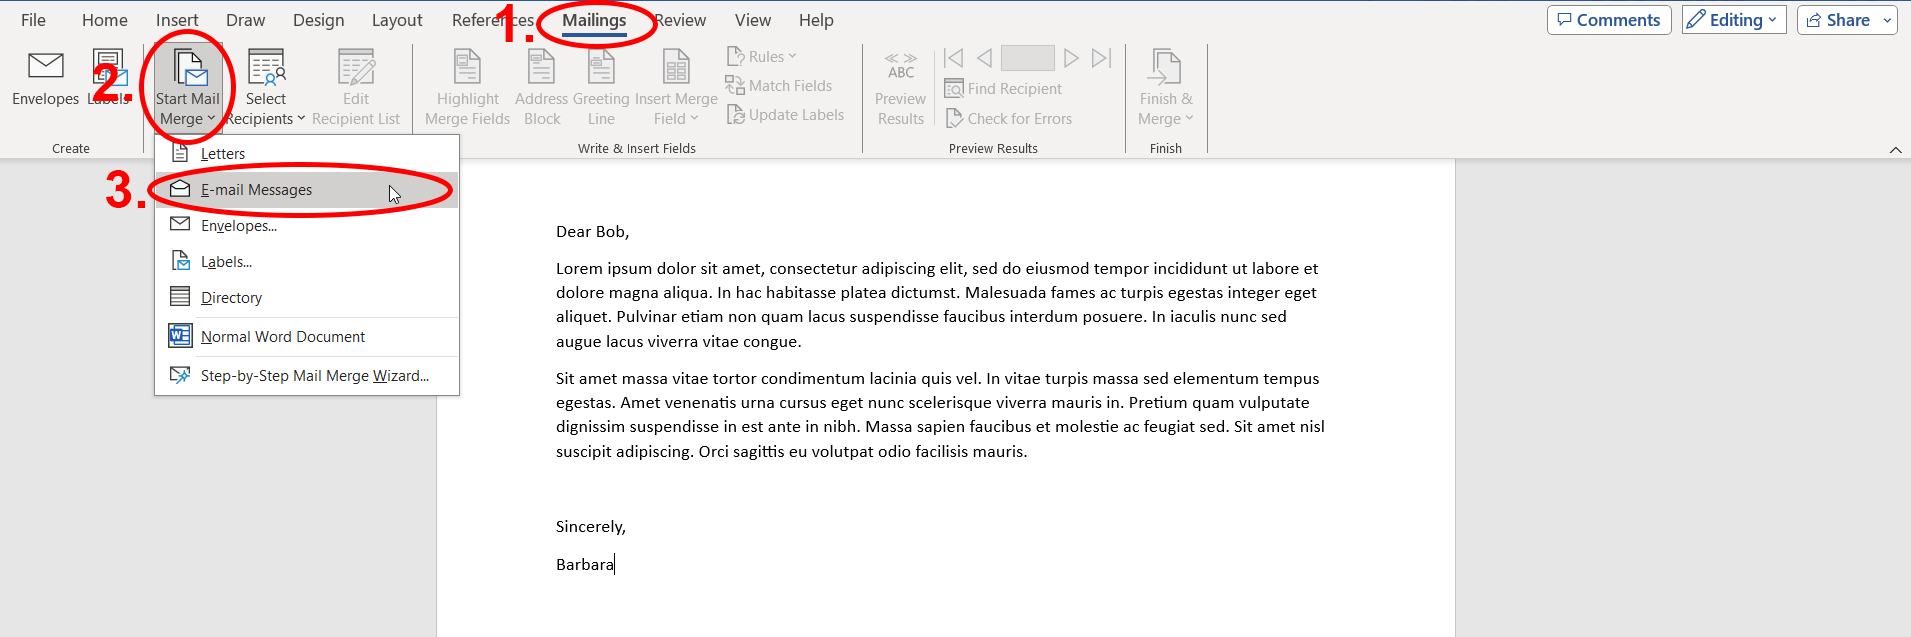
Once your email draft is ready, you can start the Mail Merge process. To do this, go to the “Mailings” tab and click the “Start Mail Merge” button. In the drop-down menu, select “E-mail Messages”.
Step 3: Select your email recipients
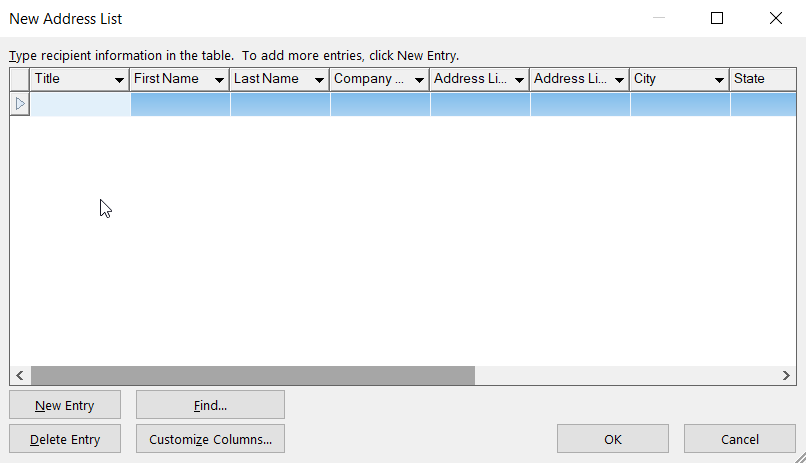
Next, you need to select your email recipients. You can do this by using an existing contact list in Outlook or by creating a new list. To select an existing contact list, click “Select Recipients” and then choose the list you want to use. To create a new list, click “Type a New List” and then enter the contact information for each recipient.
Type in what ever information you need into each field. Only the Email Column is necessary for bulk sending emails, but if you wish to add custom greetings with each contacts name, you will need to input the name fields on each entry.
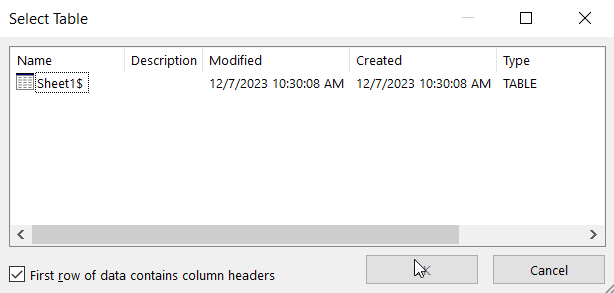
If you prefer to mass import contacts from a spreadsheet, click “Use an Existing List”, located just below “Type a New List.” You can import directly from Excel, Access or various other databases, but we’ve found the simplest method is to export your contact sheet as an Excel file (.xlsx) or a Comma Separated Values file (.csv). For the best results, ensure the top row of your spreadsheet includes all the headers (e.g. first name, email address, etc.).
Step 4: Personalize your message
Once you have selected your recipients, you can personalize your message by adding merge fields. Merge fields are placeholders that will be replaced with the contact information for each recipient when the email is sent. To add a merge field, click the Insert Merge Field button and then select the field you want to add.
For example, to add the recipient’s name to the email greeting, you would select the First Name field. You can also use merge fields to insert other contact information, such as the recipient’s company name, email address, or mailing address.
Step 5: Finish & Merge
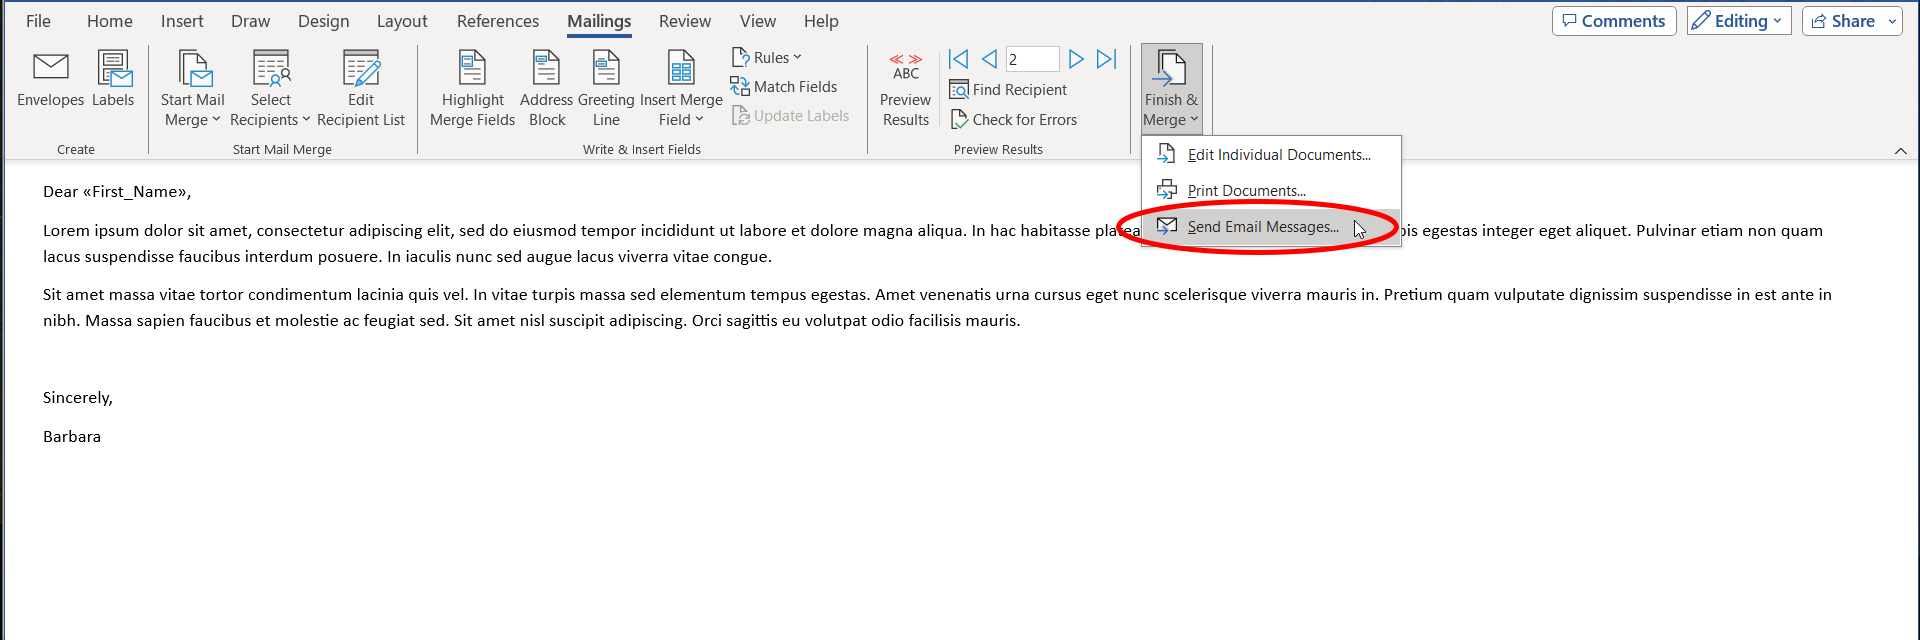
Once you have personalized your message, you are ready to send the email. To do this, click the Finish & Merge button and then select Send E-mail Messages.
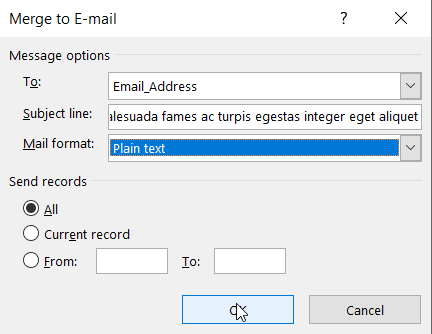
Under the “To:” dropdown menu, select the header of the spreadsheet column with the email addresses in it. Next type your subject line and select the mail format. You can send in Plain text, HTML if you have embedded images, or even as an attached word document.
You may be prompted with warnings that a program (Microsoft Word) is trying to access your email address information. Simply click “Allow” and Outlook will then send a personalized email to each recipient in your list.
2024 Bulk Email Best Practices
1. Authentication:
All senders must implement email authentication measures, including SPF & DKIM to verify the sender’s identity. Bulk Senders must also set up DMARC authentication to enhance security.
2. Unsubscribe Links:
Ensure that recipients have a convenient, one-click option to unsubscribe from commercial emails. Bulk senders must process unsubscription requests within two days.
3. Spam Rate Threshold:
For all senders, spam report rates must stay below 0.3%.
4. DNS records:
Have a valid forward and reverse DNS record for your sending IP in the PTR record
5. Transport Layer Security (TLS):
Use a secure connection (TLS) when sending emails. It’s like ensuring your message is delivered in a sealed envelope.
If you find it overwhelming and time-consuming to stay ahead of ever-evolving technology, don’t worry! WingSwept is here to help lighten the load. Let us assist you in determining if WingSwept is the perfect match for your business’s future endeavors with a quick phone call.


